Building a Self-Hosted Cloud Storage Solution with Raspberry Pi, Nextcloud, Docker, and Cloudflare Tunnel

Cloud Storage: a method of storing and managing data on remote servers accessible over the internet.
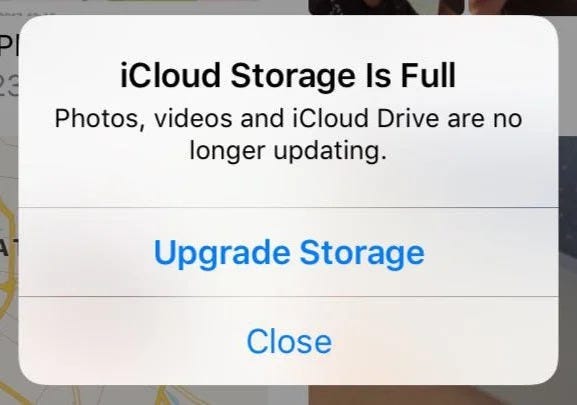
If you have ever gotten the message “Storage is full,” “Can’t back up your phone,” or “Upgrade to iCloud+” you understand my gripes.
In an ever-changing world of technology, data has become the pinnacle of everyday transactions and business. Whether it is photos on your phone, message conversations, or those saved notes you are never going to look back on (be honest, we all have been there), there is no greater commodity in the digital age than, you guessed it, data!
To prove this, take a moment to consider three of the big tech giants: Apple — from selling cloud storage to their massive share of telephones, and other Apple products, Microsoft — from their massive Windows share of computers all baked in with their version of cloud storage (One Drive), and finally Google — from their initial free 15GB version of Google Drive to later updates that require $$$. You can’t blame these guys, it's good business. Plus, why on earth would they care to store your data if you are not paying them!
The idea is to always offer a “free” baseline tier so when that runs up it is an inconvenience for the user to look for alternatives. But if you are like me and you rather not spend the money on monthly subscriptions (raise your hand if you are subscription burnt out ✋), and you are up to build and pay upfront then I have a treat for you.
Spoiler alert — my cloud server has faster upload and download speeds locally than the big shots above.
Why? and Hardware.
I needed a long-term, cost-effective solution to share and store files securely for family use. Traditional cloud services can be pricey and raise concerns about data privacy and control. Hence, my criteria was:
Privacy and Control: Complete control over where data resides and how it’s managed.
Reliability: High uptime with minimal manual intervention.
Accessibility: Secure access from anywhere.
Efficiency: Energy-efficient hardware with automated processes.
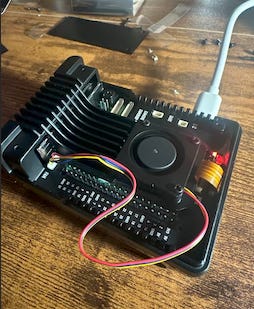
For this project, I chose a Raspberry Pi 5 with 16GB due to its performance, energy efficiency, and versatility. However, any microcomputer with 8GB, should ideally work. At one point, I even considered building it on my retired S22 phone, but calmer minds prevailed
For storage, there are a couple of functional routes you can go. SSDs (Solid State Drives) will provide the most optimal build here as they will both reduce power load and bump read and write times to something worth keeping around. Specifically, M.2 SSDs are a great pick as they use storage protocols (also known as Non-Volatile Memory Express or NVMe) that allow SSDs to communicate with a computer system via the PCIe (Peripheral Component Interconnect Express) interface. This creates a massive bump to the read and write speeds (e.g. 530 MB/s Sequential R/W Speed for a SATA SSD something like SAMSUNG 870 EVO v.s. 7,250 MB/s Sequential R/W Speed for a M.2 SSD using Gen4 NVMe something like 990 EVO Plus). So to summarize, HDD < SSD SATA < SSD M.2 NVMe.
Note: Rasp Pi 5 only supports PCIe 3 (Gen3), though any newer generation M.2 SSD will still work with the caveat that the read/write will be bottlenecked.
With our newfound board and storage, I made the decision to choose a case that had an M.2 PCIe slot. This allowed me to not have to add any external wiring or hardware that would leave the case my Rasp Pi is in.
For the OS, Rasp Pi Foundation has graciously created a fantastic GUI for their imager.
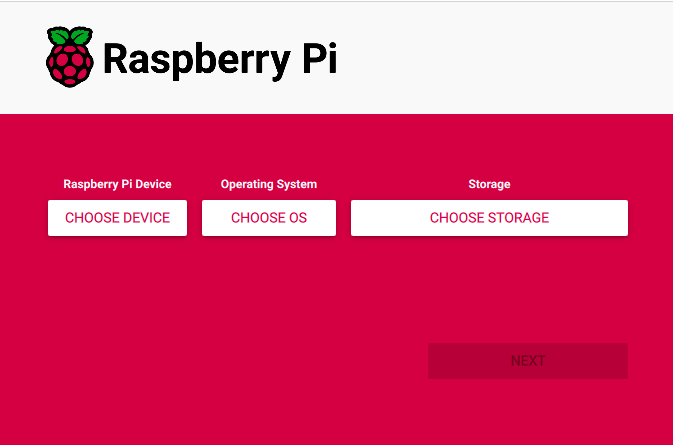
I flashed Raspberry Pi OS Lite (64-bit), this version would be headless or in other words have no GUI so we would communicate with our board via SSH. This design choice allows us to not waste additional resources for our Rasp Pi (Linux server) that we want to have running 24/7. To complement and make the most of the many features of the Rasp Pi, I chose to host the OS image on a microSDXC A2 chip (A2 is just faster) so that we can isolate our OS env and not need to partition our M.2 chip to both serve as storage and host. This also is useful because if the board or any component that connects to our M.2 becomes dislodged or malformed, the microSDXC will allow us to troubleshoot and still access the Rasp Pi as the chip is directly inserted into the board.
Finally, for WIFI, I opted for ethernet. I know that this seems like the obvious choice, but most consumer-grade home service providers do not provide symmetrical download/upload speeds. What does this mean? Your service provider (Xfinity, Verizon…) knows that most consumers, unlike enterprises, will not need to upload data as much as they will download, thus… they lower upload speeds unless explicitly requested. Test this yourself with a speed test and you will notice your upload is half or less than your download. Fortunately, based on the service package you purchase, the upload factor tends to trail with it (to a certain degree). At the bare minimum, upload speeds of 50 MB/s would be ideal. Unfortunately, there isn’t much you can do to improve your situation without spending more money. This cost difference alone might even be a significant deciding factor in whether this self-hosted solution is right for you.
The Software.
With the hardware humming along, the next step was building the software stack that would actually bring my homegrown cloud to life. The priorities were the same: keep it simple, keep it reliable, and never sacrifice security for convenience.
The backbone of this entire operation is Docker. If you have never used Docker before, think of it as a way to put every app into its own little box — safe, self-contained, and easy to manage. Instead of manually installing and configuring Nextcloud, a database, and all the dependencies directly onto the Raspberry Pi (and then having to redo it all from scratch every time something breaks), Docker lets you spin everything up with a single file. If something goes wrong, you can roll back or rebuild with one command. It is genuinely a game-changer for anyone trying to run server software at home.
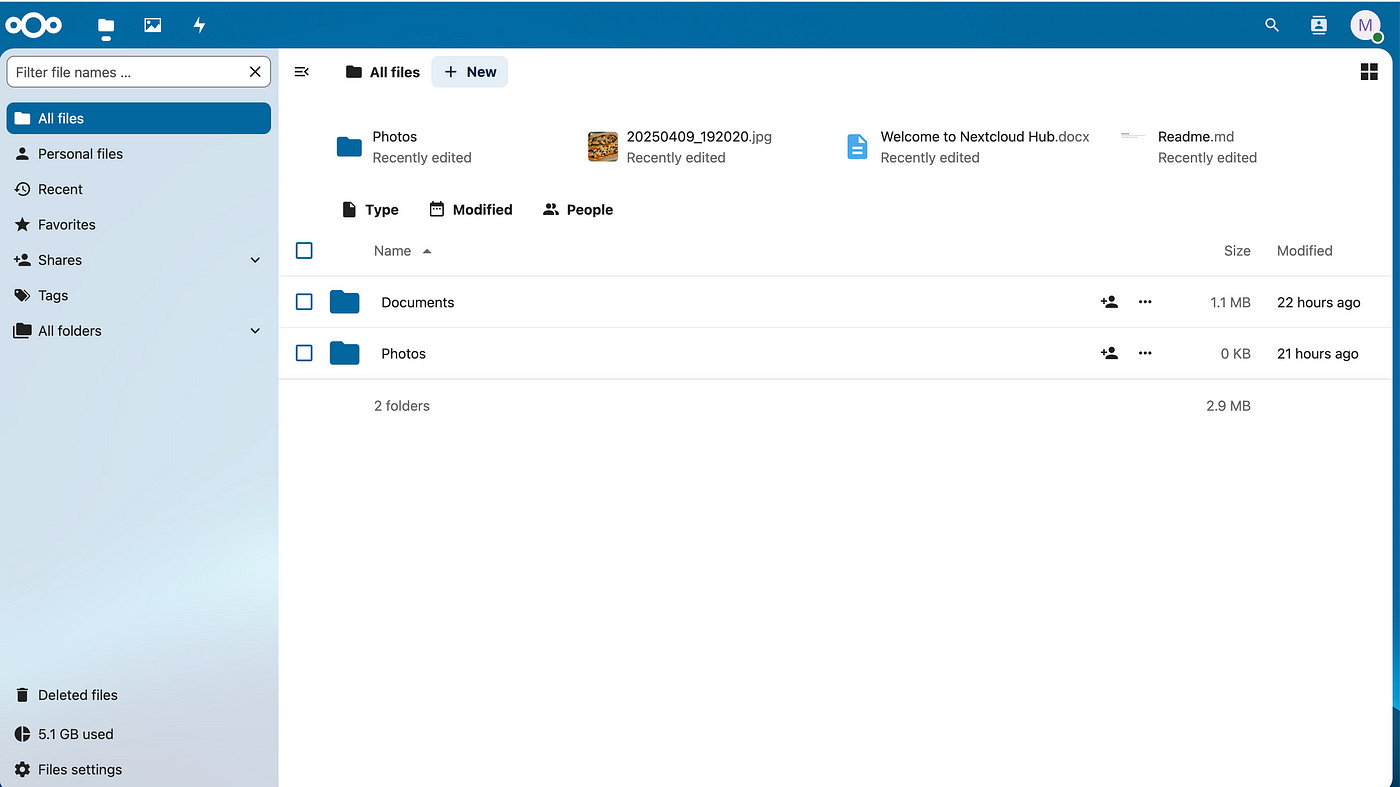
Nextcloud itself is the centerpiece — the main reason why any of this is worth doing. It is an open-source platform that mimics everything you would expect from the likes of Google Drive or iCloud, but with one huge difference: your files are always under your control. You get secure web and mobile access, the ability to create multiple user accounts, fine-grained sharing controls, and even things like end-to-end encrypted folders. Whether you are backing up your phone photos, syncing important documents, or just need an easy way to move files between devices, Nextcloud is shockingly robust for something you can run on a ~$100 board in your living room.
But having a great cloud platform is only half the battle — none of it matters if you can’t access your stuff when you need it, wherever you are. That’s where Cloudflare Tunnel comes in. This was the part that surprised me the most, both in how easy it was to set up and how much peace of mind it provided. Cloudflare Tunnel acts like a secure doorway from the internet straight to your Pi, without exposing your home network to the wild west of the web. It means you get a clean, encrypted web address for your cloud, handled by a company whose whole job is to stop hackers and bots at the gate. Best of all, you don’t have to mess with port forwarding, dynamic DNS, or any of the other networking nightmares that scare most people away from self-hosting.
The whole stack works together so smoothly that you almost forget about it after the initial setup. Backups, upgrades, and even catastrophic “oops I broke something” moments are all way less scary when everything runs in containers. In the end, what you get is a fast, private, and modern cloud experience — except you’re the one in charge.
If you’ve made it this far, hopefully, you’re starting to see the appeal. This isn’t some pie-in-the-sky, hobbyist-only project; it’s a practical answer to the modern data problem. Building your own cloud on a Raspberry Pi is cheaper than paying for years of subscriptions, gives you total control over your data, and — let’s be honest — is pretty satisfying to have control of Terabytes of data that you own. I won’t pretend there weren’t a few hiccups along the way (anyone who’s spent an afternoon debugging a Docker network issue knows what I mean), but the payoff is worth it.
For me, the real reward isn’t just having more storage. It’s knowing exactly where my files live, who can access them, and how everything is secured. It’s being able to send a download link to my family that doesn’t funnel their photos through five different corporate servers. And it’s having a little server in the corner quietly doing its job — never asking for another monthly payment, never locking me out because my card expired.
So, if you’re tired of “Your iCloud storage is full” popups or just want to try something new, this project is absolutely within reach. With a bit of tinkering, a weekend’s worth of work, you can build your own private cloud — one that’s yours, and only yours, from top to bottom.
Nice! I always love to see ‘hacked’, simple elegant solutions to problems like this (using a Raspberry Pi with an external SSD and some out-of-the-box software) vs. over-engineering something.
I am a little curious how the data replication actually works (and if it’s comprehensive replication of all iCloud data - how does the Photos app replication work specifically?), since one of the most convenient features of iCloud is the asynchronous media replication of your photos and videos.
Maybe that’s too nitpicky, but this seems to work great for your actual iCloud Drive files. Great work, Navid!